
General Fitness Workout (about 1 hr.)
- Sep 11, 2018
- 7 min read
Part of what I want to provide with this BLOG platform along with all the instructional videos are written workouts you can take to the gym right away and get busy. These workouts will be geared for different training effects such as Hypertrophy, Absolute Strength, General Fitness, Power Development, etc.
General Fitness (approximately 1-hour routine)
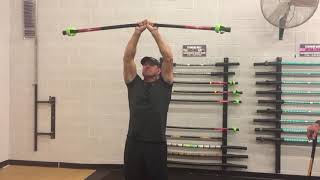
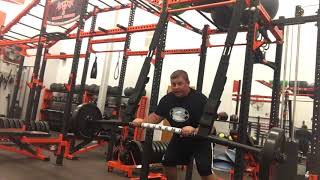
I use the Tsunami Barbell in my training and these workouts are written to make use of flexible bar technology.
Routine #1 (This routine consists of 8 sets. There are 4 exercises in a set. Perform all 4 exercises with no rest between each move. After the fourth exercise is complete rest only enough to complete the next set (2 minutes rest maximum or as Heart Monitor allows if using strict heart rate as the guide).
Set #1: Bench Press w/ Level 1 Tsunami Bar
Reps: 5 Max Effort Acceleration Stabs and 5 Max Effort Speed (10 rep total)
Load: 25-lbs per side (This is a good starting place for 250 to 300-pound 1RM benchers.
Remember, a Level 1 Tsunami Barbell loaded w/ 25-lbs per side can deliver 415-lbs of impulse force at the point of eccentric / concentric transition at a bar speed of 3.8 fps.
HOW TO PERFORM: Acceleration Stabs are performed by assuming the proper Bench Press set up, remove the barbell from the rack, and lower to about 4” off the chest. From the elevated position off the chest take a deep breath and explode the hands through the bar driving it forcefully to the top arms extended keeping the scapula retracted. Once at the top position hold the bar there as it oscillates out to almost motionless. Your goal is Maximum Effort bar speed from the bottom position to the top position. You are getting the voluntary contraction pressing the bar, involuntary contractions as the bar oscillates out, and an isometric contraction while you stabilize the bar at the top position.
Once the oscillations of the bar have settled out ease it back down to 4” off the chest, come to a complete stop (NOTE: don’t cheat it here. COME TO A COMPLETE STOP), take a deep breath and violently explode the bar to the top position. Repeat for 5 reps.
The next 5 reps are Max Effort Speed. Finishing out the Acceleration Stabs you will be at the top position of the bench press stroke. For these next 5 reps PULL (yes, pull the bar down … don’t just ease the bar down) and keeping the bar off the chest explosively reverse it to the top position where you will catch it and PULL it back down. This is a PUSH / PULL motion. Repeat for 5 reps and rack it.
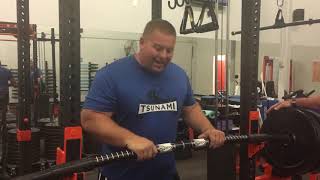
Lat Pulldown (I use the Tsunami Bar Level 3 or Level 1)
Reps: 12
Load: Level 3 Lat Bar 160-lbs … Level 1 I’ll 120-lbs.
HOW TO PERFORM: The flexible technology that Tsunami Lat bars provide is different from your standard steel accessory bars. The Lat Pulldown can be performed with controlled speed where the bar’s flex will offer a shock absorbing effect at the point of eccentric / concentric transition. This dampening of reversal shearing is especially apparent in the hands, elbows, and posterior shoulder / scapular area. Another popular method to using Tsunami Lat Bar is to select a weight and bar flex to use, and depending on the amount of weight used with the selected flex bar, the bar will bend (the heavier the weight the more the bend). The idea is to maintain the bend in the bar. Thus, you will be using a recruitment pattern just to maintain the bend in the bar on both the concentric and eccentric phases, and you will experience a recruitment pattern to execute the move itself. Maximum contractibility.
Tsunami Bar Ab Roller (This really a “Take Your Pick Ab Move”)
Reps: 15
Load: Body Weight
The Tsunami Bar Ab Roller works very well for me, but any number of challenging ab moves may be utilized here.
Prowler Quad Sled Push (The Quad itself weighs about 100-lbs)
Distance: 100’
Load: Just the sled weight
Set #2: Bench Press w/ Level 1 Tsunami Bar
Reps: 5 Max Effort Acceleration Drop and Pop and 5 Max Effort Speed
Load: 25-lbs per side (This is a good starting place for 250 to 300-pound 1RM benchers.
Remember, a Level 1 Tsunami Barbell loaded w/ 25-lbs per side can deliver 415-lbs of impulse force at the point of eccentric / concentric transition at a bar speed of 3.8 fps.
HOW TO PERFORM: Max Effort Acceleration Drop and Pop reps are performed by assuming the proper Bench Press set up, remove the barbell from the rack, and starting from the top position take a deep breath and quickly pull the barbell down stopping about 4” off the chest then explode the hands through the bar driving it forcefully to the top arms extended keeping the scapula retracted. Once at the top position hold the bar there as it oscillates out to almost motionless. Your goal is Maximum Effort bar speed from the top position back to the top position. You are getting the voluntary contraction pressing the bar, involuntary contractions as the bar oscillates out, and an isometric contraction while you stabilize the bar at the top position.
Once the oscillations of the bar have settled out repeat for 5 reps.
The next 5 reps are Max Effort Speed. Finishing out the Acceleration Drop and Pop reps you will be at the top position of the bench press stroke. For these next 5 reps PULL (yes, pull the bar down … don’t just ease the bar down) and keeping the bar off the chest explosively reverse it to the top position where you will catch it and PULL it back down. This is a PUSH / PULL motion. Repeat for 5 reps and rack it.
Lat Pulldown (I use the Tsunami Bar Level 3 or Level 1)
Reps: 12
Load: Level 3 Lat Bar 170-lbs. Level 1 130-lbs.
HOW TO PERFORM: The flexible technology that Tsunami Lat bars provide is different from your standard steel accessory bars. The Lat Pulldown can be performed with controlled speed where the bar’s flex will offer a shock absorbing effect at the point of eccentric / concentric transition. This dampening of reversal shearing is especially apparent in the hands, elbows, and posterior shoulder / scapular area. Another popular method to using Tsunami Lat Bar is to select a weight and bar flex to use and depending on the amount of weight used with the selected flex bar, the bar will bend (the heavier the weight the more the bend). The idea is to maintain the bend in the bar. Thus, you will be using a recruitment pattern just to maintain the bend in the bar on both the concentric and eccentric phases, and you will experience a recruitment pattern to execute the move itself. Maximum contractibility.
Tsunami Bar Ab Roller (This really a “Take Your Pick Ab Move”)
Reps: 15
Load: Body Weight
The Tsunami Bar Ab Roller works very well for me, but any number of challenging ab moves may be utilized here.
Prowler Quad Sled Push (The Quad itself weighs about 100-lbs)
Distance: 100’
Load: Just the sled weight
Set #3: Bench Press w/ Level 1 Tsunami Bar
Reps: 5 Max Effort Acceleration Stabs and 5 Max Effort Speed
Load: 35-lbs per side
Facepull (I do these on a selectorized machine most of the time)
Reps: 15
Load: 65-lbs
Jackknife (Take your pick Ab move)
Reps: 15
Load: Body Weight
Prowler Quad Sled Push
Distance: 100’
Load: 90-lbs
Set #4: Bench Press w/ Level 1 Tsunami Bar
Reps: 5 Max Effort Acceleration Drop and Pop and 5 Max Effort Speed
Load: 35-lbs per side
Facepull (I do these on a selectorized machine most of the time)
Reps: 15
Load: 65-lbs
Jacknife (Take your pick Ab move)
Reps: 15
Load: Body Weight
Prowler Quad Sled Push
Distance: 100’
Load: 90-lbs
Set #5: Bench Press w/ Level 1 Tsunami Bar
Reps: 5 Max Effort Acceleration Stabs and 5 Max Effort Speed
Load: 45-lbs per side
Lat Pulldown
Reps: 10
Load: I’ll start at 180 on a Level 3 bar and I’ll start at 140 on a Level 1 bar
Hanging Leg Raise (Take your pick ab move)
Reps: 15
Load: Body Weight
Prowler Quad Sled Push
Distance: 100’
Load: 180-lbs.
Set #6: Bench Press w/ Level 1 Tsunami Bar
Reps: 5 Max Effort Acceleration Drop and Pop and 5 Max Effort Speed
Load: 45-lbs per side
Lat Pulldown
Reps: 10
Load: I’ll start at 180 on a Level 3 bar and I’ll start at 140 on a Level 1 bar
Hanging Leg Raise (Take your pick ab move)
Reps: 15
Load: Body Weight
Prowler Quad Sled Push
Distance: 100’
Load: 180-lbs
Reps: 15
Load: 55-lbs per side
HOW TO PERFORM: On these last two sets the weight is high enough that the explosive capacity should be diminishing and bar speed slowing, so now we’ll focus and just moving the weight with steady speed … Push / Pull as hard as you can go while maintaining control and slot position.
Facepull
Reps: 15
Load: 75-lbs
Rotational Med Ball Wall Blasts
Reps: 10 each side
Load: 16-lb MB
HOW TO PERFORM: Stand perpendicular to a wall about 7’ away. Stand in an athletic position with the feet shoulder width apart. Hold the Med Ball just under chest level with your lead arm hand supporting from underneath and the other hand in position behind the Med Ball ready to explosively drive the ball into the wall. The move is to turn away from the wall and load the trail leg, then rotationally turn and drive the trail arm through the ball launching it into the wall. Do the prescribed rep on each side.
Prowler Quad sled Push
Distance: 100’
Load: 270-lbs


Comments